How To Download BoostBot and Run it On PC
This guide quickly goes through everything you need to know to bot on a Windows PC for the games listed below.
Step 1: Download BoostBot on Windows 10+
Click the button below to download BoostBot. Run the .JAR and follow the instructions.
Make sure you have Java JRE and JDK 17 installed on your computer.
Download JRE here.
Download JDK 17 here.
Your Windows username and folder path cannot contain any non English characters.
Don’t have or want to bot on a Windows PC?
We offer a “Bot For Me” service in which we will set up the bot on our 24/7 uptime bot server and run it for you. You will be assigned your own bot expert who will contact you for your details, including how you want the bot to run. This process shouldn’t take longer than 15 minutes, making it the easiest way to bot.
Rent a 24/7 uptime server that you can connect to and run your bots from. This is a great option for those who don’t have a computer, or those who don’t want to keep their computer on 24/7. The bot server comes pre-installed with everything you need and can run an unlimited number of accounts.
Step 2: Install an Emulator
An emulator allows you to run an Android mobile operating system on your computer.
Step 1: Install The Emulator
Step 2: Run The Emulator at Least One Time to Finish Configuration Process
Step 3: Register or Log In to a Google Play Account
Step 4: Disable Auto-App Updates in Your Google Settings
BoostBot only works with the emulators listed below.
LD Player V5 or V9.0.13+
Nox
MEMu
Step 3: Start Botting
Once you set up one account, you can easily setup infinite accounts! Make sure to purchase the premium version of the bot here.
Step 1: Select Your Emulator and Game
You will need to first log in to the bot, to do that you need a BoostBot account. You can make one here.
Select the emulator and game from the dropdowns. Click save and continue.


Step 2: Create Emulator Instances
It is recommended to run the emulator at least one time manually so that it finishes all configurations after installation.
Create at least one emulator instance by pressing the “Create” button (you can also manually create the emulators in the emulator itself). This process may take a couple minutes, please do not close the bot until the process is finished!
It is recommended to NOT delete the first emulator instance.
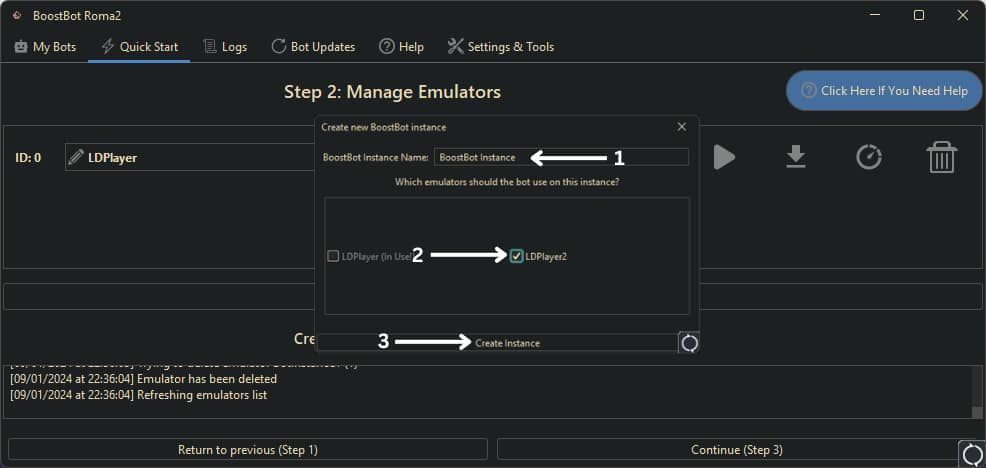
Step 3: Create A BoostBot Instance
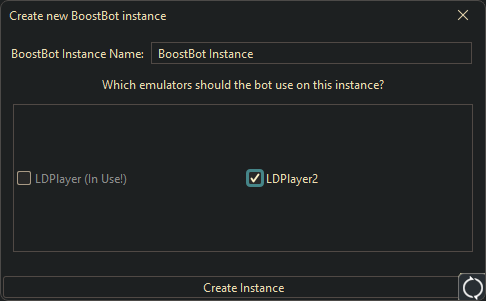
Give your instance a name and select one or more emulators that the bot should use on the instance.
Important! Using the same emulator on multiple BoostBot instances will lead to conflicts.
Press the “Create Instance” button and proceed to the last step by pressing the “Continue” button.
The bot will automatically assign the first (primary) emulator if none is selected.
Step 4: Settings
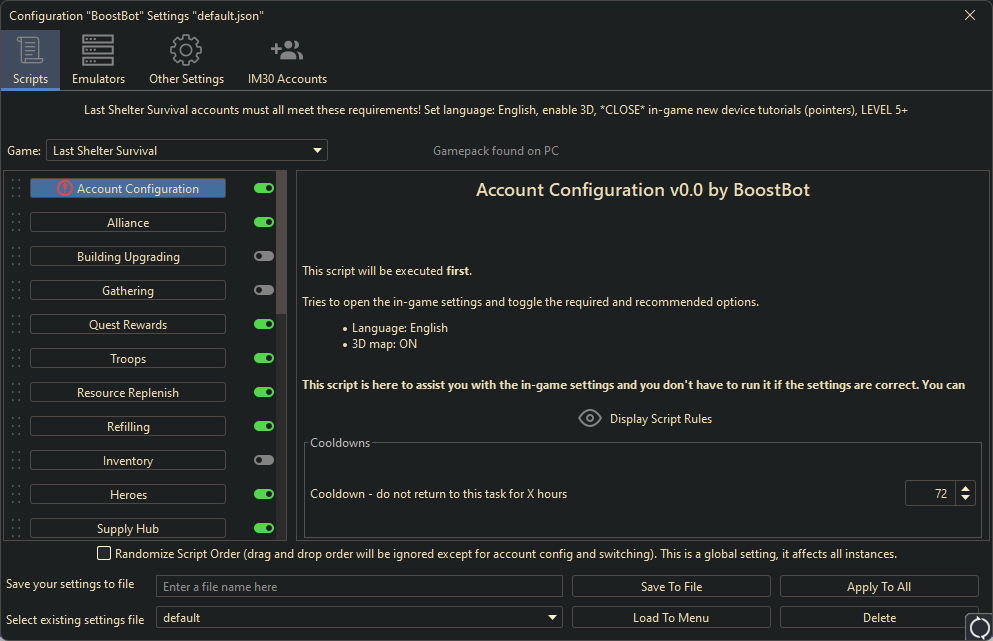
Select the game that you want the bot to play for you from the list menu in the “Scripts” tab. Go through all the available options and set the bot up the way you want it to play. Drag and drop the available tasks in the menu to determine the order in which the bot should execute them.
BoostBot can work with multiple emulators. After completing all tasks it will close the current emulator and open the next one. You can configure the emulators that are tied to the current BoostBot instance in the “Emulators” tab.
You can also save your script settings to file in the “Scripts” menu and tell the bot to use different settings on different emulators by selecting the settings file in the “Emulators” menu next to the emulator checkbox.
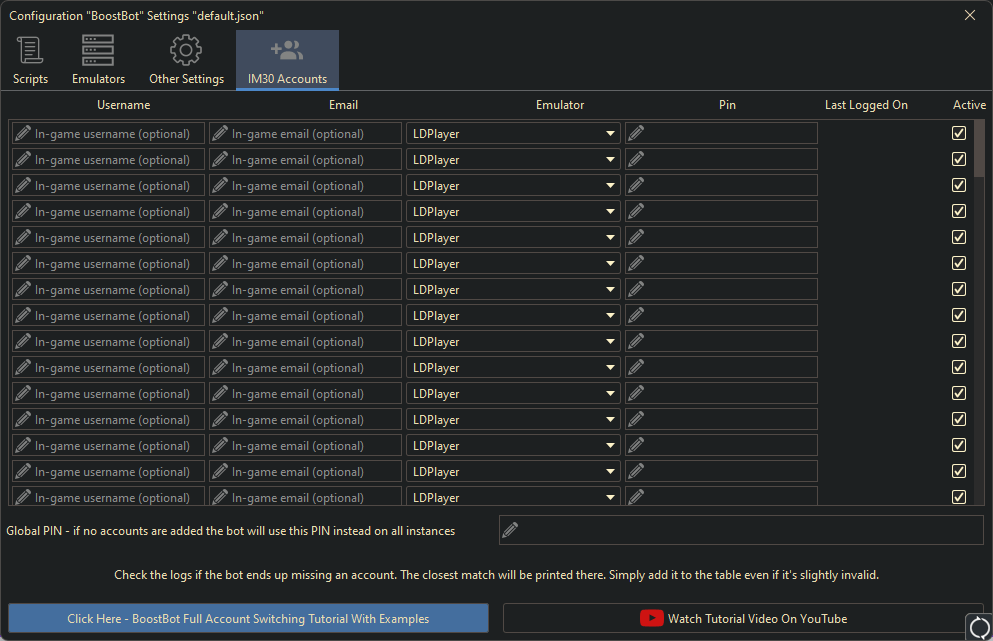
The bot is able to change accounts within game (if the game supports that). Simply enter the in-game username and/or email into the “Accounts” table. For example on Last Shelter it will use the “IM30” account switching option and look for values on screen that match what you’ve entered. If it ends up missing an account it’ll print the closest match into the log, so that you can modify the values.
Close the menu and save your settings. It may take some time for the settings to save, as the bot will also attempt to reconfigure the emulators if needed.
Press Play!
The bot is now configured, press the play button and enjoy!


